Automating qual_devices updates

Well, once again I was presented with a nice AutoSupport warning once I logged into my NOW account. Since we don’t have CIFS and/or NFS licensed on our filers, I wrote a cute little script that does the whole work for me.

The whole thing is surly based, that FTP is configured (as I described previously).
TSM and NetApp – Another Quick Hint

Well, we’ve been trying to come up with a decent way to backup NetApp snapshots to tape (SnapMirror To Tape), so we evaluated all the available methods of using NDMP backups.

  1. There’s Image Backup in two different variants – FULL and DIFFerntial
  2. There’s SnapMirror To Tape

So the Image Backup is one of the ways. However the DIFFerntial backup only works for CIFS and NFS shares (which we don’t use). We only have FC luns (or rather FCoE luns), so there’s only a single (or in case of the boot luns more than one) file in each volume. With that however, each run of the Image Backup with the DIFFerential option, it’s gonna backup the full size of the volume (plus the deduplicated amount).

The SnapMirror To Tape option presents another problem: We intend to use SnapManager for SQL/Oracle, which creates “consistent” snapshots of the database luns. However the SnapMirror To Tape backup doesn’t have an option to use an already existing snapshot, but creates another one. Which puts the whole SnapManager business down the curb. So we either do use a SnapMirror To Disk from one database lun to another controller and then run the SnapMirror To Tape from the second controller or come up with another way to back them up to TSM.

Setting up a phpMyAdmin auto-update

Well, just like everybody else, I’ve been using phpMyAdmin to do my casual MySQL fixing/work on this website. However, recently the phpMyAdmin developers switched to Git on SourceForge and then to GitHub shortly after that.

So, the guy over at Network Jack wrote down what I had already been doing:

However, as I said before, they switched from SourceForge to GitHub, thus you need another URL.

After that, you just need to add a simple cronjob that enters the directory and runs git pull.

vm-online-backup – Another day, another PowerCLI script

Well, on Friday I had a short chat with someone from one of our application departments, stating he wanted a backup copy of a VM (ain’t to hard), but a) they don’t want any downtime and b) it has to be identical to the original.

So I sat down today, googled for a bit and actually found something that pretty much does what I want, though I had to fix it up a bit … So find attached a script, which creates a hot-clone from a snapshot and then only if the latest clone was successful deletes the old one.

The backupvms.csv looks pretty simple:

TSM and NetApp – Quick Hint

Well, to save everyone else the trouble (since it isn’t documented anywhere – and I just spent about an hour finding the cause for this), if you need to configure NDMP on your NetApp Filer, make sure you also configure an interface other than e0M.

Apparently the necessary controlport for NDMP (10000) is being blocked on e0M, thus ndmp may be configured and running, however TSM is gonna complain that it is unable to connect to the specified data mover.

SLES11.1 and updated multipath-tools

Well, after I scripted the installation the other day, I tried installing SLES11.1-Updates to the freshly installed systems. Guess what ? The thing broke. Initially (it was late Friday afternoon – like 6 PM – before my one week vacation) I didn’t have much time to debug the issue, so I sat down last week and looked at the issue.

During the installation, when first starting multipath via command line, the scsi-mpatha device appears, and each and every occurance of this is subsequentially being used (and other stuff replaced by this actually) during the whole installation phase.

But what is this multipath-tools update doing ? No clue what exactly, however after installing the update the system is bricked. The system is basically looking for /dev/scsi/by-id/scsi-disk-mpatha and waiting for this device to appear. But since the update robbed the device, the system is no longer starting.

So I went ahead and digged around in the /dev/disk/by-id directory. Turns out /dev/disk/by-id/scsi- is actually pointing to the right device, and thus I ended up using it. So I rewrote all my scripts (profile and chroot/post-chroot adjustments) as you can see below, and for now at least, I have a working installation that lets you install updates! (careful it gots electrolytes)

Now what’s left to do for tomorrow is “fixing” the already (previous to those changes) installed systems, so we can install security updates on those too!

VMware Update Manager issues

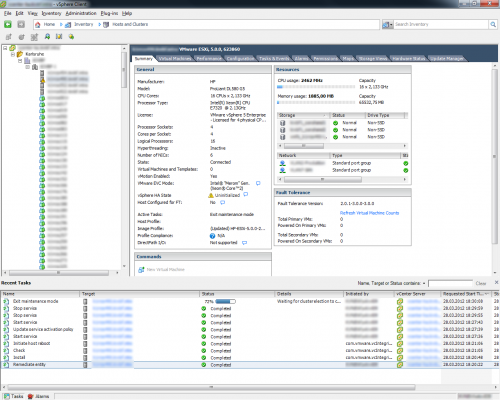
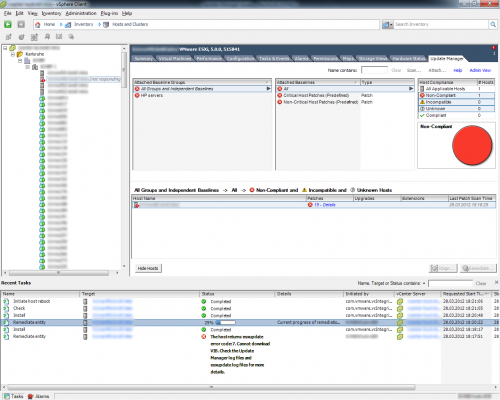
Well, I recently (last Wednesday) had a lot of trouble with Update Manager.

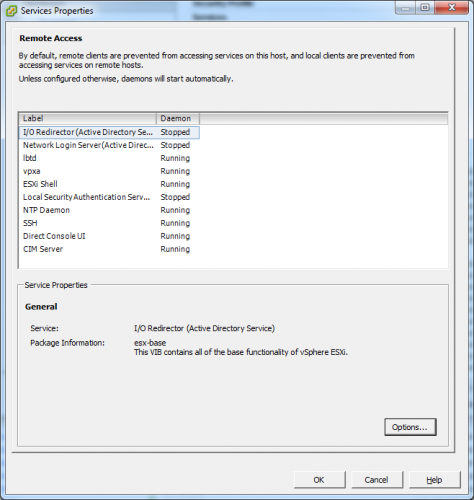
First I thought, upgrading vCenter and modules to 5.0U1 would solve my troubles, however it did not. Update Manager was still complaining about something. Since neither in the vCenter Update Manager nor the vCenter log itself were having any useful information I enabled SSHd and the ESXi Shell via the vCenter client:

SSH’ed into the ESX host and looked at /var/log/esxupdate.log, and found this particular log:

As you can see from the above log, for whatever reason, the Update Manager is trying to install an updated version of the VMware HA agent (vmware-fdm). Now, since that isn’t the job of Update Manager (afaik, vCenter handles that separately), I figured what the hell, let’s try and remove it as the ESX host was already in Maintainance Mode:

And guess what: after removing the package and then rerunning the Remediate task on the host, my troubles were gone.

hama_mce client for XBMC on Ubuntu

Well, I finally switched back to the official builds of XBMC (well, semi-official).

Now, since my previous and my current media center doesn’t come with a remote like, say a Boxee box, I built myself a custom one using a Hama MCE Remote Control and a Logitech Harmony 300. After trying a bunch of things (it actually works like a standard mouse), I stumbled upon this Trac ticket.

After first wrangling the sources into a patch, sometime ago when I switched to a new media center I started using the official builds as I mentioned earlier.

One disadvantage of the official builds is, that I can’t patch in the event client. Eventually I decided to write a small debian package containing everything the event client previously had.

Running XBMC/Ubuntu on Zotac HD-ID34

I recently bought a replacement for my aging Acer Revo R1600. I decided to go with the HD-ID34, since I didn’t wanna fiddle with buying a bunch of components. Installed a copy of Windows 7 on it (just to try it out …. :-P), and downloaded the Ubuntu 11.10 mini.iso. However the mini.iso apparently has issues (no clue which), basically it boots but gets stuck when bringing up the network connectivity (which is fucked up, since the mini.iso needs network connectivity to contiune the installation).

So I went a version back (11.04 – Natty Narwhal) and installed my stuff, however the audio didn’t work. So I kicked of a distribution upgrade, and about half an hour later that was finished. But still no audio …

1) The SPDIF channels were muted (no surprise there)
2) XBMC sent the audio do card 0, device 0 (which is basically /dev/null)

After playing around with the audio output settings (and trying different devices without any luck), I finally found a post for OpenELEC for the ZBOX (for an older version, but non the less, it still applied) describing what I had to configure.

Audio output = HDMI
Speaker configuration = 7.1 (or the what your receiver is capable of)

Audio output device = custom
Custom audio device = plughw:1,7

Passthrough output device = custom
Custom passthrough device = plughw:1,7

What’s just left now, is actually mounting the thing to the wall, since it looks just shabby sitting on my TV wall.

NetApp FAS/Data ONTAP public key authentification with CIFS/NFS license

Well as the title says, sadly we bought our FAS6210 without CIFS/NFS license. Thus, in order to create the folder structure/add the authorized_keys file, you’ll have to work for your money a little bit.

First, you need to run cifs setup / cifs passwd somewhere. I did it on our Data ONTAP simulator, which comes in handy for things like that.

You’ll get a cryptic looking password (no clue which format that is), looking like this: _OnWddr)xa.

Now, in order for the ftpd process to work, you need to create a /etc/passwd file. Usually the cifs setup would take care of that, but since we don’t own a CIFS license and I didn’t wanna add a trial license, I simply did what I described above on our simulator.

Now, open a SSH session with your filer. Create a new /etc/passwd file using wrfile. The new passwd file should look like this:

Now make sure, to replace the whole string in between the double dots with the one you got from the output of cifs passwd. After that is done, enable the FTP daemon using the options command:

Now, create your authorized_keys file somewhere (I exported my Public Key using PuTTygen), and from there open a ftp sessions with your root user on the filer. In the ftp shell run this:

The above example asumes that you created the authorized_keys file in the folder Desktop (that’s where my Desktop folder is, so replace it to suit your needs). Afterwards, disable the FTP daemon again:

And, tada … enjoy SSH password-less with your shiny public key.